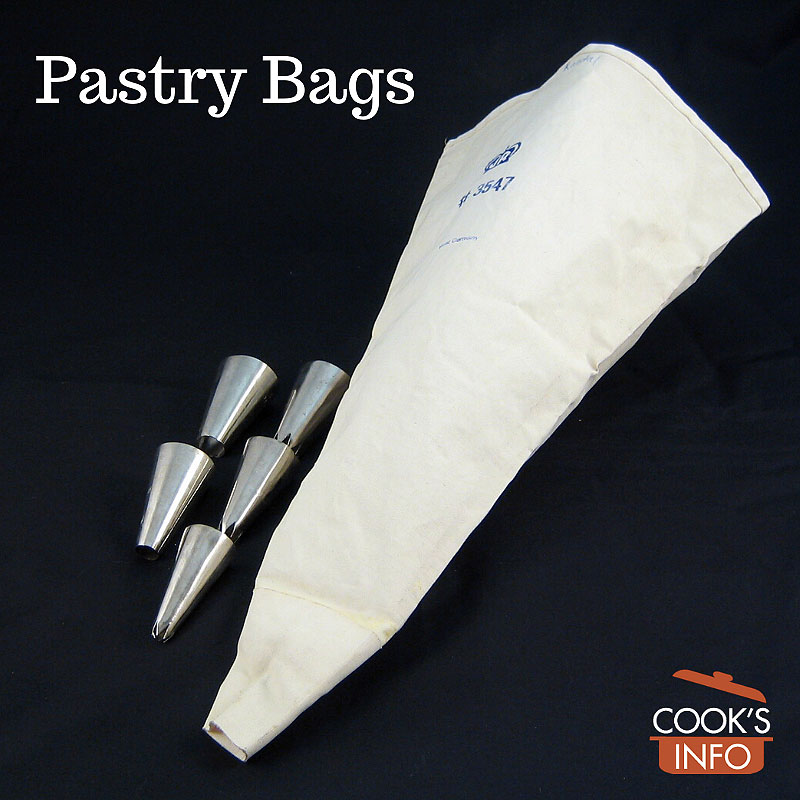
Pastry Bags. © Denzil Green / 2005
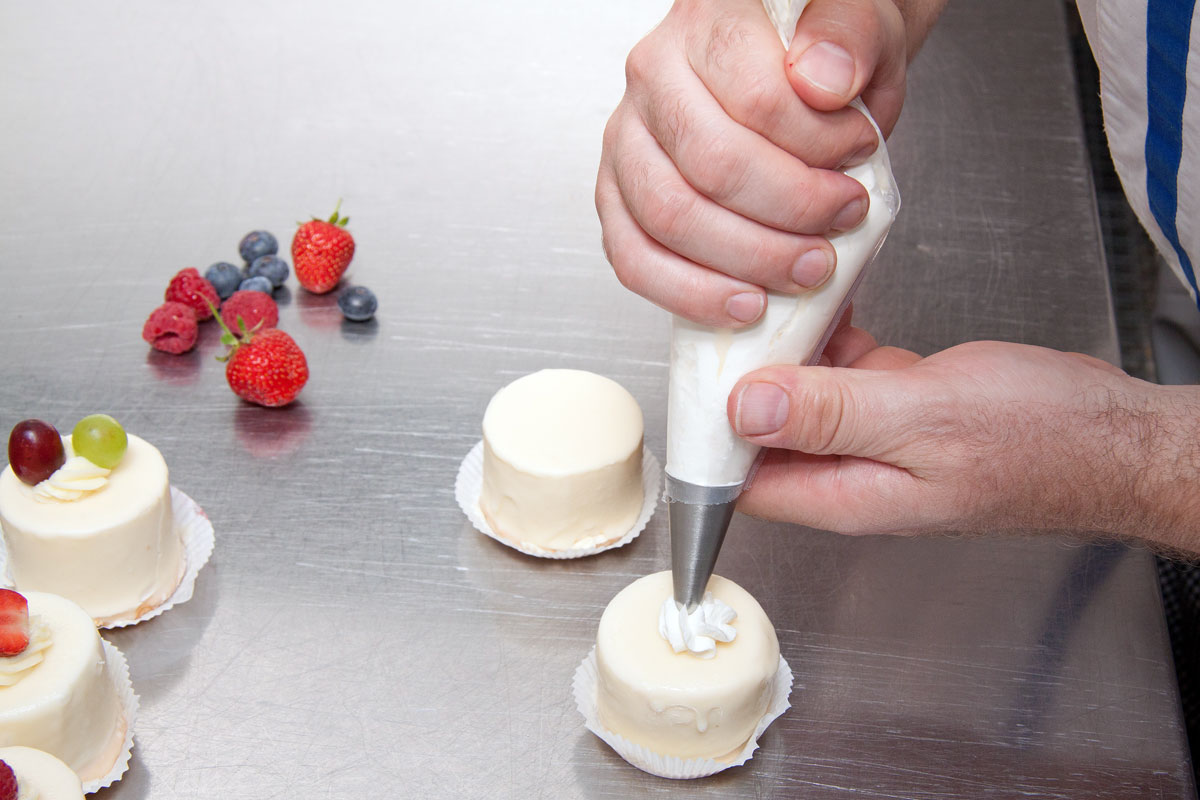
A pastry bag (aka “piping bag”) is a bag shaped like a cone, with a small opening at the tip of the cone, and a wide opening at the other end. You put the food item that you are working with into the bag through the wide opening, then squeeze the food item out the small end. Decorative tips may be fitted in the small opening at the tip of the cone to create a design as you force the food through. The act of squeezing the food out is often called “piping.”
Pastry bag materials and sizes
Pastry bags can be made of canvas, plastic or plasticized cloth.
Commercially, you can get disposable plastic ones by the roll that you tear off as you need, guaranteeing sterility. Disposable ones are usually clear plastic. However, the issue of single-use plastics quickly becomes apparent.
You can also buy small parchment disposable cones to hold anywhere from a teaspoon to a tablespoon of stuff, usually icing.
You can also buy “double” bags that are partitioned. These allow you to pipe two different things at once from the same bag for a striped effect, etc.
Pastry bags also come in many sizes. Serious cake decorators may have several sizes in use at the same time.
Pastry bags don’t last forever. Even canvas or cloth ones carefully stored away may eventually become stiff and brittle with the passage of time and thus unusable.
Piping tips
You can have your piping come out plain, or you can fit a decorator tip onto the small end, which will cause the food item to come out in various-shaped streams. The tips come in different “numbers”, indicating size of the tip and style. They can be made of white nylon or stainless steel. There is always a moment of panic when you realize you don’t have the right sized tip. You always have too few when it comes to making a choice of which one to choose, and too many whenever you see them rattling around in a kitchen drawer.
There are handy things called couplers that can make your life easier. Instead of inserting a tip through the bag, you insert a coupler instead and proceed as normal with filling the bag. Then, you attach your tip to the coupler. Halfway through, you can change your mind and swap another tip onto the coupler. This allows you to change the tip being used without having to empty and refill the whole bag, or start another bag.
Piping tips are called piping tubes in the UK, and sometimes referred to as nozzles in various places.
Though pastry bags won’t last forever, with care your decorative tips should.

Piping tips for pastry bags. bernswaelz / Pixabay.com / 2018 / CC0 1.0
Caring for a pastry bag
When finished piping, unless you are using a disposable bag of course, wash your pastry bag well, then let it dry well, sitting it out overnight to air, or it may go sour or mouldy. The tips can go through the dishwasher in the cutlery tray, perhaps pinned down by other cutlery you are putting in.
Commercially, there’s a risk pastry bags won’t be properly sanitized after use. Commercial ones intended for re-use normally have a recommended maximum number of washes a bag should go through before being tossed. Disposable ones are more expensive.
Sometimes restaurant kitchens are tempted to wash and re-use disposable bags, either to be more thrifty or “ecological.” This can be dangerous from a food safety viewpoint if for instance a bag was used to pipe uncooked meat, then sloppily washed, and then used for icing. There could be a serious cross-contamination issue impacting the health of their patrons.
Health officials advise that restaurants should designate re-usable piping bags for specific uses, and make their staff aware of potential microbe hazards with piping bags.
What can go in a pastry bag
The food item that you are piping needs to be relatively thick, and something that will retain its shape after piping, or there’s no point. But with that one restriction, the sky is the limit.
Piping bags can be used to fill eclairs, doughnuts, and cream puffs, to pipe out anything from cookie dough to icing to mashed potato. Julia Child filled sausage casings using a pastry bag with a large tip.
Other things often put in pastry bags are beaten egg for meringue, whipped cream, softened cream cheese, peanut butter, devilled egg yolk, jam, and forcemeat.
How to use a pastry bag
- When you’re filling a bag, fold the top half of it down outwards to form an outside cuff.
- If you are using a decorative tip, you now put it into the pastry bag then fit it into the small tip of the bag. You won’t be able to put it in after your food ingredient is the bag. What holds the tip in place is that the pastry bag hole will allow only the “tip of the tip” through.
- To make putting the filling in easier, twist the tip end of the bag temporarily shut, then set the pastry bag tip end down into a measuring cup, jar or bowl big enough to hold it up right, but small enough to allow the cuff of the wide end of the bag to be folded over the rim to hold it in place.
- Fill the bag half full. Resist the temptation to actually fill the bag; it will actually be easier to use, and your work will go faster, if you only fill the bag half full.
- Unfold the outside cuff when done, and lift it out.
- Twist the top half of the bag to close off the bottom half, forcing the ingredients towards the small hole and pressing down to force air out.
- Shake the bag two or three times to help shake out air pockets.
- Point the tip where you need the food item to go, then squeeze it. As you squeeze, keep twisting the top part down to force the ingredient down.
- To hold the bag during piping, place one hand underneath the part that has the filling (you’ll use this hand to aim it), and use the other hand to hold the top twisted part. You’ll use this hand to squeeze.
- Have the tip at a 45 degree angle to the object you are doing the piping out on to.
- If you have to put your filled piping bag aside for a while, put a toothpick into the tip to prevent it from drying and clogging.
Pastry bag in use. Stux / Pixabay.com / 2011 / CC0 1.0
Practice makes perfect
It is very hard to get piping right the first or even second time out. Most of us produce something that looks like a cack-handed Picasso.
The first challenge is mastering how to set the thing up and fill it; the second challenge is how to wield it. And finally, having surmounted all that, you’re faced with the third, real challenge, which is trying to produce something nice looking that will make all the preceding faffing about worthwhile.
Pros recommend that before you use a pastry bag “live”, you practice with mashed potatoes of varying degrees of thickness at a time when there’s nothing else happening in the kitchen, and well before the big event that you want to produce something stunning for.
Substitutes
A plastic sandwich bag. You put your ingredient in it, seal it with a twist tie or the zippy seal, then snip off one of the lower corners of the bag. (Better to start with a small snip, as you can always snip more off — you can’t put it back on!) Then squeeze the ingredient out through that hole.
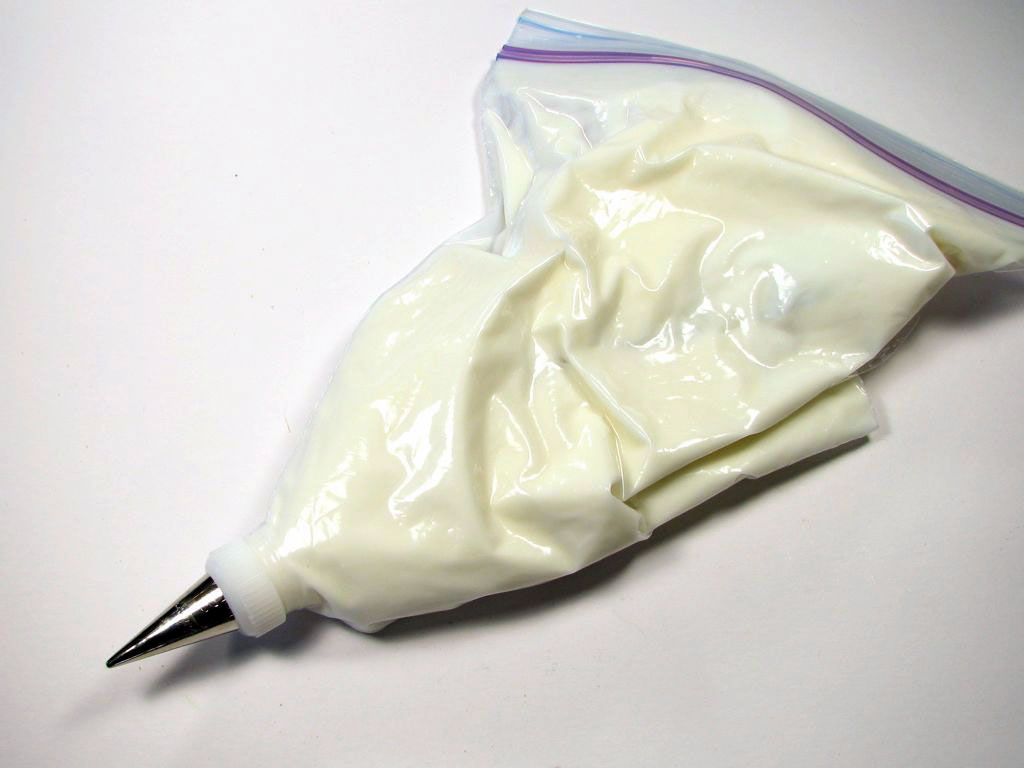
Makeshift pastry bag, using a disposable plastic sandwich bag. oskay / wikimedia / 2007 / CC BY 2.0
You can also use a decorative tip with this: just do the snip first, put the tip in, then fill, seal and proceed.
You can make your own piping cones out of waxed paper.
Small homemade pastry bags are often considered better for small quantities and for very flowing items such as icing. Take a square of paper (greaseproof, parchment or waxed), and fold it in half diagonally so that you form a triangle. Roll the triangle up into a cone. Tape the edge. Fill half to two-thirds full. Fold the top of the bag down snugly onto the filling, and press down a bit. Then snip the tip of the cone and proceed.
If you wish, you can tape the top down to reduce the likelihood of filling trying to escape out the top when you are squeezing.
If you’re using a tip, after you’ve taped the edge, snip it, and insert the tip, then fill.