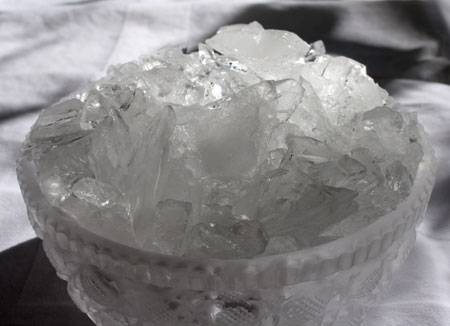
Coarsely Crushed Ice
© Denzil Green
Crushed Ice is water that has been frozen into ice, typically in a shape such as a cube, then crushed. It can be crushed finely, or coarsely.
Crushed Ice has more surface area than ice in a cube-shape. Consequently, it will cool things more quickly. Crushed Ice will chill a drink more quickly, though the drink will also get watery more quickly. It is also useful for packing around a drum when making ice cream.
Restaurants, hotels and hospitals have special machines that churn Crushed Ice out. You can’t really buy Crushed Ice as a consumer; you have to make it at home.
You can buy home electrical small appliances that crush ice, but few enough use enough of it often enough to justify the storage space required in between uses.
Crushing Ice in a Blender
Don’t use a blender that has a plastic jug instead of a glass one. The ice will make the plastic cold and fragile, and then the battering from the ice cubes will likely finish the job and shatter the plastic jug.
The performance all depends on your blender. If you have an ordinary blender, you may risk burning its motor out if you try to crush ice with it. Or, it won’t have enough oomph to do anything but round the corners off your ice cubes. Ideally, to satisfactorily crush ice and not ruin your blender, the motor on the blender should be at least 400 watts. Some higher-end blenders now advertise their ice crushing abilities; some even have designated buttons for fine or coarse crushed ice. Some blenders even have optional ice crushing canisters that you can purchase and attach. Many of these attachments are made of stainless steel, which are even safer than glass.
The smaller the ice cubes you start with, the better the results you will get. Some people find that with their less-powerful blenders, they are best to crush the ice manually a bit at first to make the pieces smaller. Don’t pack the ice too tightly into the blender’s jug, or put in too many ice cubes — they need to be able to jump around in the jug. Most blenders will crush ice better if you either put a little water in with the ice cubes, or let the ice cubes sit for about 5 minutes out of the freezer before tipping them into the blender. This helps to give the blades some traction, so the ice cubes don’t just jump around in there like a bunch of bingo balls.
You can’t crush ice with most hand-held, stick blenders (though one or two have come on the market now saying that they do do ice.)
Don’t attempt to use a food processor to crush ice in. It will almost certainly damage the blades, if not also the plastic bowl.
Crushing Ice Manually
To crush ice manually:
(1) wrap it in a clean tea towel that you don’t prize too much, and then place it on the floor, and bash it with a hammer or a meat pounding mallet. Don’t place it on the kitchen counter: you might make everything on the counter jump around, or if you miss the ice, the hammer might take a chip out of the kitchen counter. If you have an outside porch or step that you can take it to, even better. The main problem with this manual method is that you want to make sure that someone responsible — and sober — is wielding the hammer.
(2) place ice cubes in a plastic carrier bag from the grocery store or elsewhere that you are sure hasn’t had raw meat, etc, in it. Tie that bag, place within another of the same, tie that as well. Take outside, and lifting the bag as high as you can into the air, drop it onto a concrete step or pathway several times.
(3) Save it up over time in the freezer. Usually as you empty ice cube trays of ice cubes in them, there are always some shards of ice that you can use as crushed ice. You also get shards of ice in the tray of an built-in ice maker. Save these shards in a container in the freezer.

