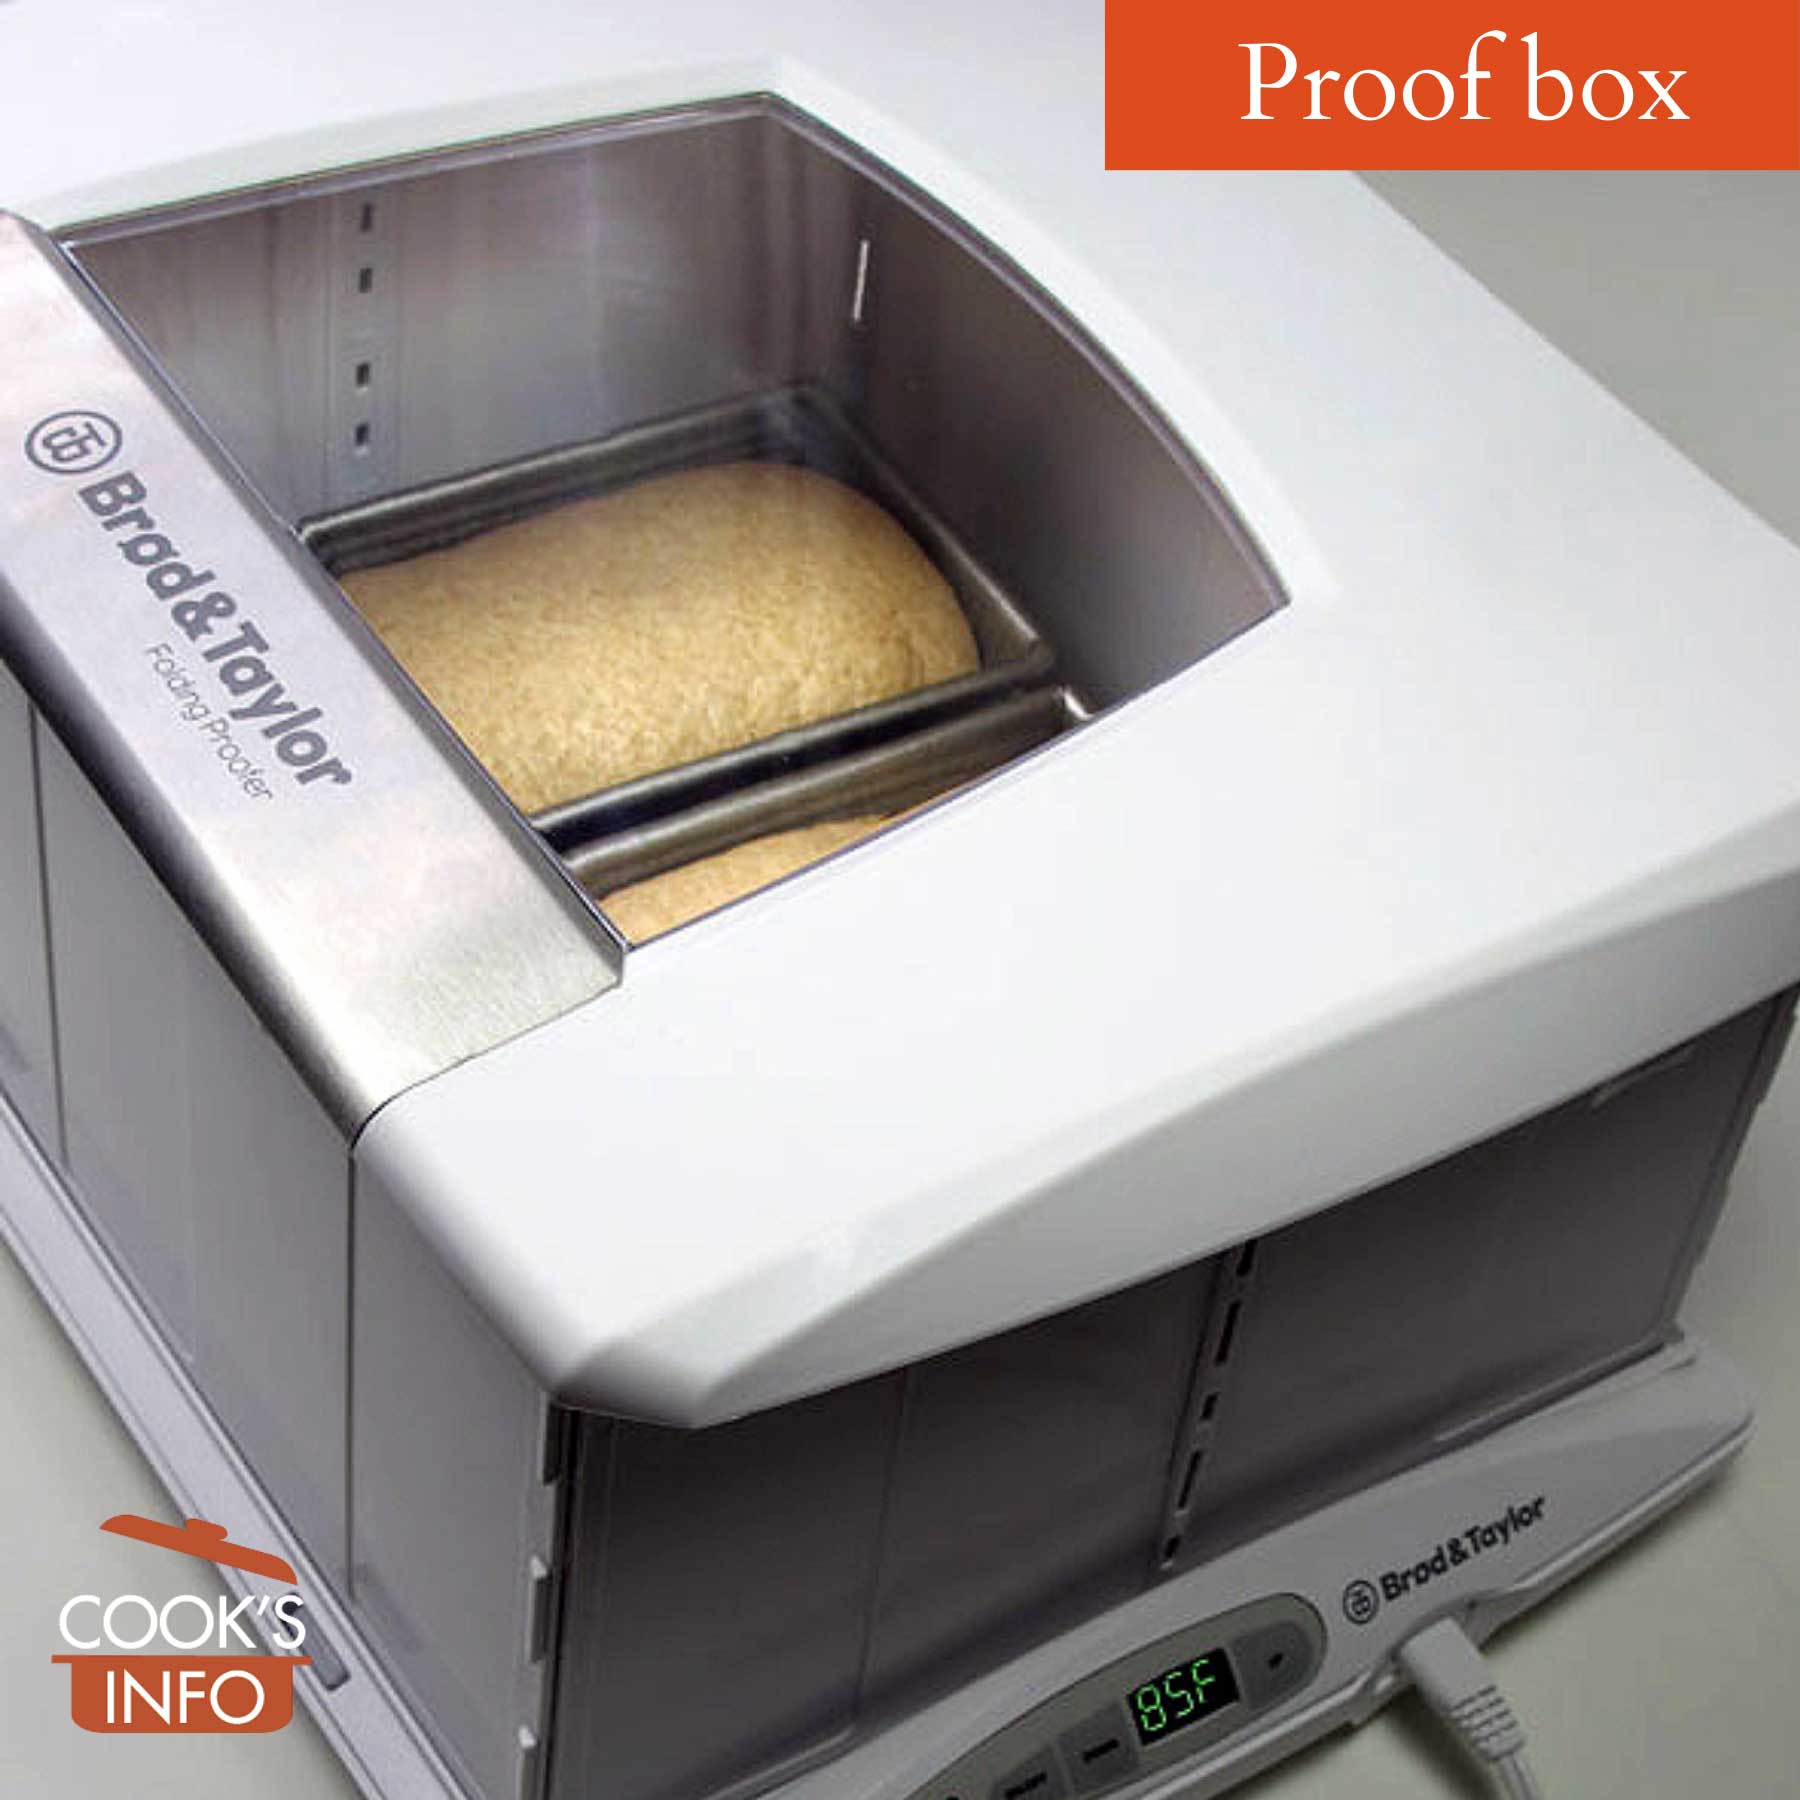
Electric home proofer. Thoughtful baker / wikimedia / 2015 / CC BY-SA 4.0
A proof box is a sealed space that provides an environment in which you can control the humidity and temperature in which yeast-risen baked goods can rise more effectively.
Humidity control
Many people at first blush think the prime function of a proof box is to provide a higher temperature, but in fact, the most important control it provides is humidity.
Dough left to rise uncovered outside a proof box can dry out. This is a problem because drying of the surface can impede expansion and therefore rise of the dough.
Dough by nature is moist. Its surface tries to reach the same moisture level as the drier air around it, so it releases moisture which migrates to the air. In a higher humidity environment, the dough won’t need to do this. Thus, the higher humidity in a proof box helps ensure that the outside edges of the dough won’t go crusty, without having to cover the dough.
Temperature
Proof boxes also provide a higher temperature free of cold drafts, allowing for a faster rise.
Bakeries aim for a temperature of around 38 C (100 F) with a humidity of 80 to 85 % in their Proof Boxes. This environment will rise doughnuts in 15 to 20 minutes, pizza dough in 30 to 60 minutes and a loaf of bread in 45 to 60 minutes. Places like Krispy Kreme Donuts have enormous proof boxes that are actually part of their assembly lines, with conveyor belts carrying the donuts slowly through them.
Bakeries will use tall, built-in units with many shelves, or small mobile ones that can be stored away to save space.
Both will have environmental controls built into them.
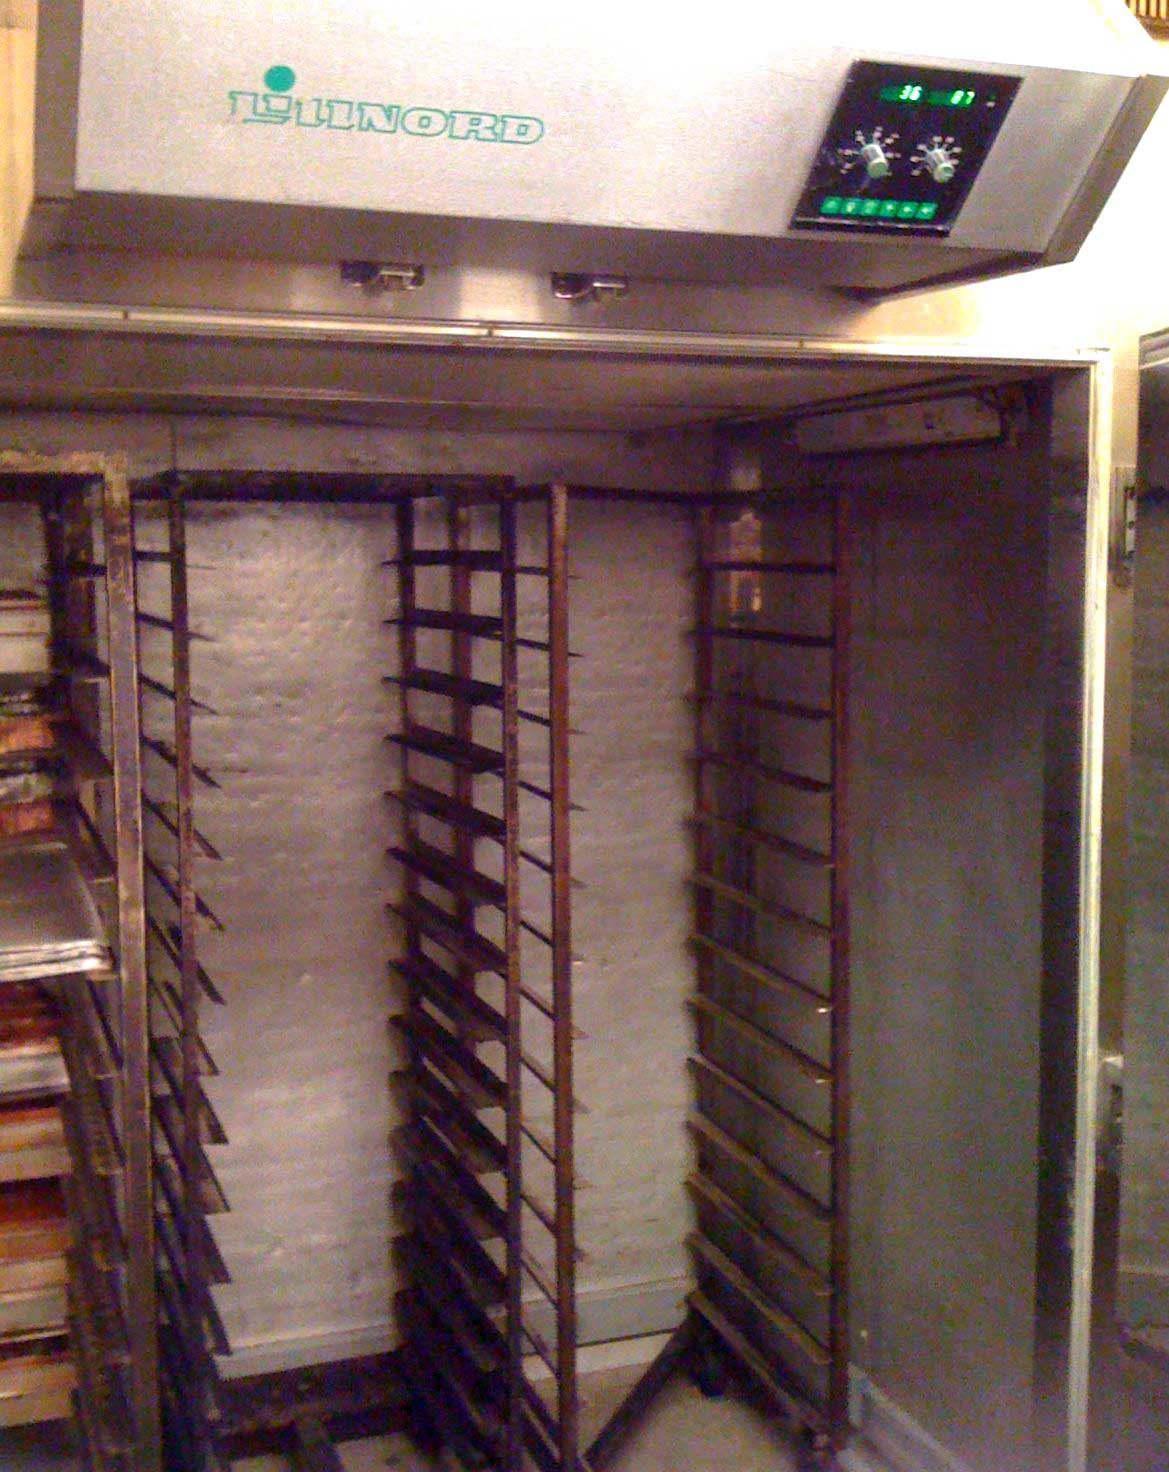
Commercial bread dough proofer. Martin Langsted / wikimedia / 2011 / Public Domain
Such a high-temperature environment is really only needed in commercial production. Home proofers aim for a temperature around 30 C (85 F) with a humidity of 80 to 85 %. There is nothing wrong with this somewhat lower temperature; it just means a slower proofing time. Given enough time, about 12 hours, dough will even rise in the fridge. Some people (particularly sourdough fans), in fact, feel that cooler, slower proofs provide better taste and texture than the speedy commercial dough rises at higher temperatures.
Home Arrangements
There are several ways that you can provide a better environment in your home kitchen for proofing dough.
Recommendation from America’s Test Kitchen
Cook’s Illustrated recommends the following procedure for proofing dough at home:
- Put an empty pan in the bottom of the oven and pour 750 ml (3 cups) of boiling water into it;
- Put an oven rack in the middle height position of the oven;
- Place the bowl of dough on the middle rack;
- Close oven door, allow dough to rise.
They feel this provides the right amount of warmth and humidity.
To be clear, there is no heating of the oven in advance, no oven light is turned on, and the dough is not covered. [1]Turning Your Oven into a Proof Box. Cook’s Illustrated. Accessed November 2020 at https://www.cooksillustrated.com/how_tos/6398-turning-your-oven-into-a-proof-box
Other proof box improvisations
In place of a proof box, put your dough near a warm spot in the kitchen or house, and cover with a tea towel. This is what grandmothers have done for generations. The tea towel prevents the surface of the dough from drying (and keeps out flies and curious fingers.)
Some people put their bread dough in the oven, just turn the oven light on, and close the oven door. Some find their oven light bulb even generates too much heat, so they have to prop the door open a bit.
You can put the bowl of bread dough in a styrofoam cooler, along with a heatproof measuring jug holding two cups of boiling water, and cover with the cooler’s lid.
Microwave as proof box
You can use your microwave as a make-shift proof box. First, be sure to measure first the bowl or pans you plan to rise the dough in, to see if they’ll even fit. Place dough in your bowl or pans, cover with plastic wrap for the first rise. Put 1 cup (8 oz / 250 ml) of water in a microwave-safe dish or cup, place in microwave, and zap on high in microwave for one minute. Push this to one corner at the back, put your dough in the microwave and close the door. Leave the door closed for the amount of rise time required (don’t turn the microwave on!) Remove the dough for the second rise, but leave the water in. Zap the water for another minute, and while this is happening, punch the dough down. Return dough to the microwave for its second rising, covered with plastic wrap or a tea towel. Let it do its second rise. The microwave method can be inconvenient if someone pops into the kitchen wanting to use the microwave during the rise time.
Cook’s Illustrated notes,
“We’ve tried… holding dough in a turned-off microwave alongside a steaming cup of water. While effective, this method can’t accommodate large bowls or sheet pans.” [2]Ibid.
For this reason, some people feel this is an ideal use for an old microwave for which you’ve already bought a replacement, but can’t bear to throw it away because it still works.
Note: some people advocate actually turning the microwave on while the dough is in it. You put the dough in a greased microwave proof bowl, cover with plastic wrap and place in microwave. Set your microwave at 10% power, no higher. Start a cycle of zapping the dough for 5 minutes, resting for 5 minutes, and repeating until the dough has doubled in size.
Making your own proof box
You can make your own proof box, either a temporary one or a permanent one. A make-shift one can be made by putting the dough in a bowl, and putting the bowl in a box, which you then enclose in a large (brand new) garbage bag. You then turn a large clean cardboard box, plastic box or bin over top the item.
Some people make one by wiring a 15 or 20 watt light bulb into a Styrofoam cooler, a clear plastic storage box, or an old fish tank with a dimmer switch to control the temperature, and a thermometer to monitor the temperature. Some people even put in little thermostats in to control the temperature automatically. Some add recycled computer CPU fans to help distribute the warm air and make the thermostat more reliable. You would definitely want to make sure you get advice on wiring and how fire-safe any arrangement like this is, so that you don’t burn the house down for the sake of a loaf of bread.
In any of these scenarios, put a wet clean cloth in with it.
Ideally, at least one part of a proof box ideally should be see-through so that you can see how the dough is progressing without opening the box.